Laban's LeatherCrafting Slideshow

Welcome to my Leather craft Blog

Hello and welcome to my Leather crafting blog. This site is not a how to guide or similar it is simply a place for me to share my leatherwork projects and celebrate my new found hobby. Please feel free to comment on my work and have a nice day.

Cheers

Laban

Thursday, 19 January 2012

Dragon Belt

My Latest project is a leather Belt with a pair of dragons emblazoned in the centre. The dragons are traditional chinese dragons from the Tandy Leather Factory "dragons" craft aid No 76606. The belt also has my favourite "basket weave" pattern that i used on the Mobile Phone holder and back of my ID wallet.

I stained the leather with Eco Flo Saddle tan dye and then after it had dried I painted the dragon design with Yellow, Orange, Black and White.

I guess that for my first real attempt at painting a detailed design i did ok..... I think i need to research how to mix and apply dye to a design a little more. I also want to research more on how to "finish" the leather because i think that there is room for improvement there also.

I discovered a fantastic new leather craft website today http://leatherworker.net and I'm already discovering better ways to colour designs and finish my leather projects.
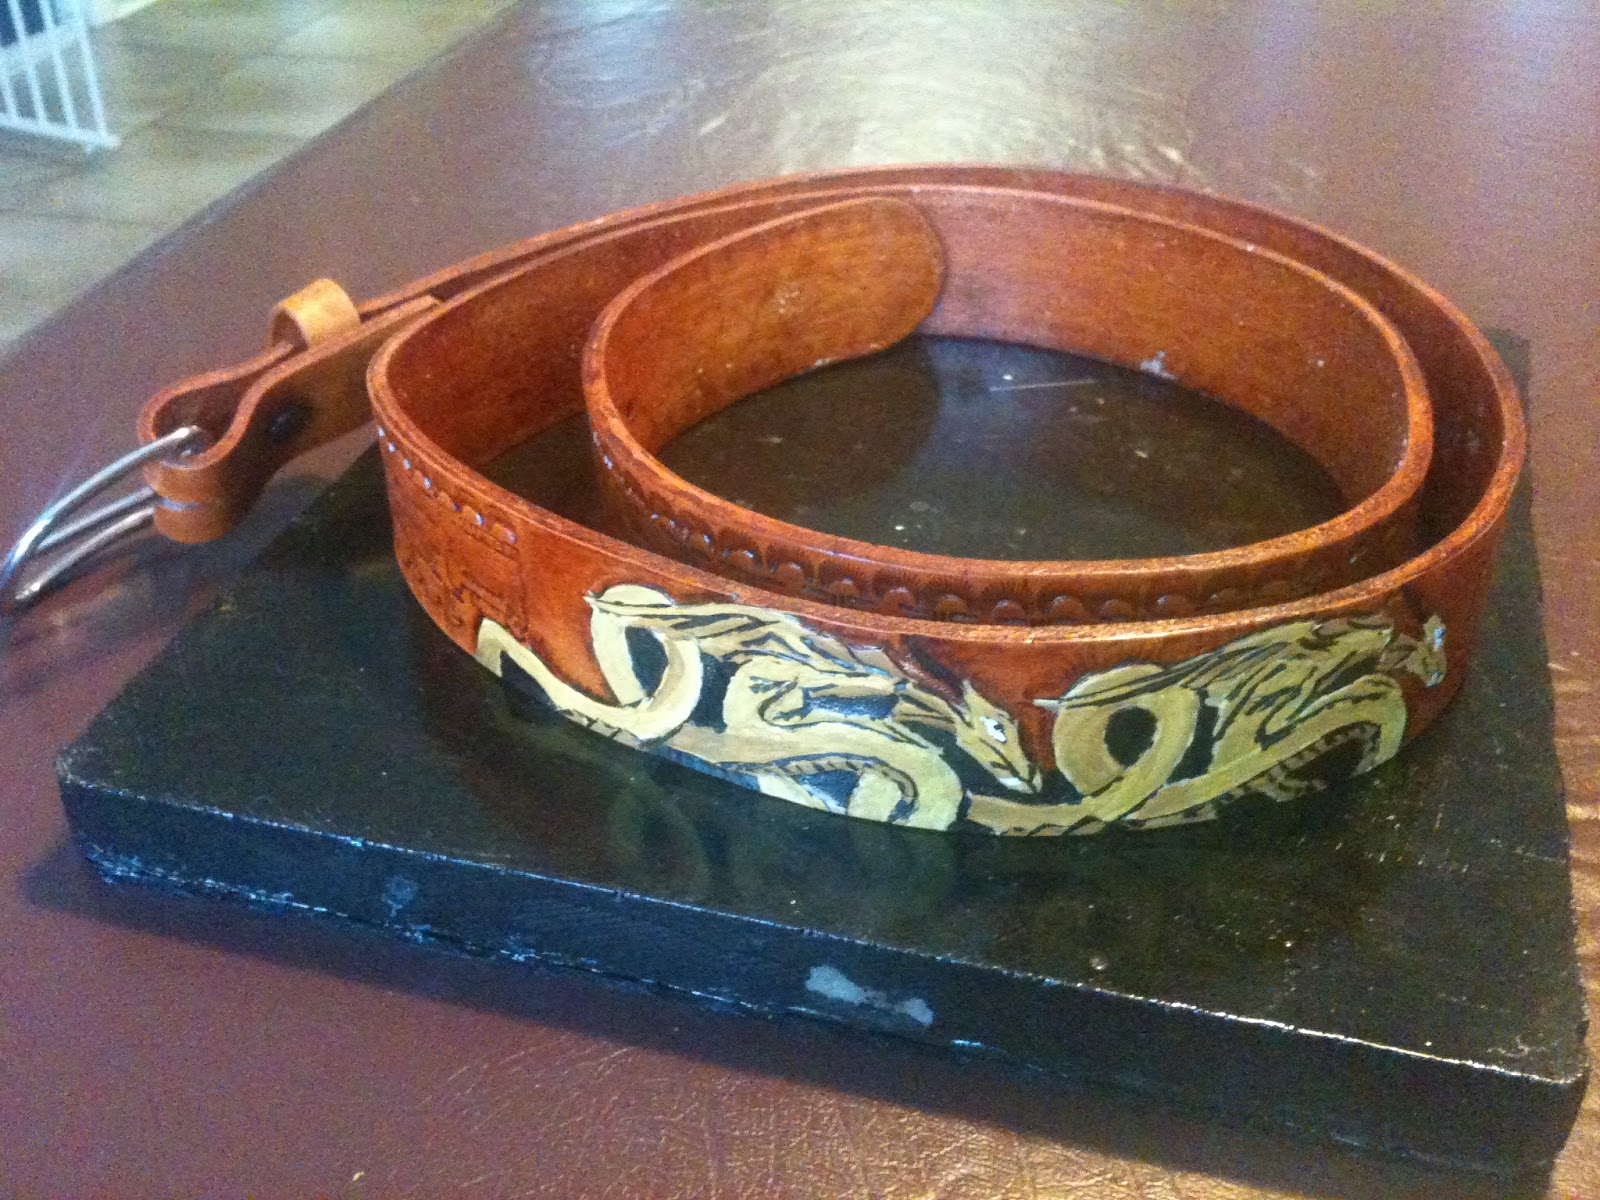
Dragon Belt

Friday, 13 January 2012

Smart Phone Cover

My latest project is a cover/belt holder for my iPhone. This was a nice project to complete, taking about 2 days including dye drying time. Techniques that i have used in this project include, the use of a craft aid, letter stamping, texture stamping and dye layering to achieve a 3 coloured effect. I also used resist around the edges to keep some of the original leather colour. Overall a great little project :)

Front View

Inside View

Back View

Closed View (with iPhone inside)

Wednesday, 11 January 2012

Drink Coaster

Well I have been on holidays for a few weeks now and had plenty of time to practice and experiment with    a variety of projects and techniques. I have also had time to surf the net and learn about leather craft tips and tricks. The other day I read about using a Stylus to bevel the edges of my tooling patterns. This technique greatly improve the smoothness of the designs and remove the tooling marks that stamps leave behind. I also have started to use colour dyes in my designs to enhance the effect of tooling the leather. My latest project, while only a simple coaster, incorporates all of the new techniques that i have learned and shows how colour can be used in leather working. I think its a great success and gives me great confidence in tackling larger and more challenging projects.

Flower Coaster practice design
I started this project with a corner design from one of my Craft Aids. Next I cut out the design with a swivel knife and then used a scooped stylus to bevel the edges. I then stamped the design and finally used Red, Green, White and Briar Brown Hi-Lite dyes to colour the design. 

Sunday, 8 January 2012

Checkbook Cover

This weeks project is a check book cover. Well it should be but i have modified it to become a notebook or personal diary cover for Pene, my beautiful wife. There are many new techniques applied in this project and overall I am rather pleased with the results.

For the tooling i used the supplied floral pattern on the back side of the cover. On the front side i used my new letter stamps, and 2 patterns from the Craftaid templates i recently purchased from Tandy Leather Factory. The first is a Celtic corner design, and the second a Scroll pattern.

The finish i used involved DK cocoa Brown for the background, and Briar Brown for Hi-Lites. The scroll is stained with Raisin Mahogany. The entire piece is then sealed with Super Shene.

The stitching is a "Double Loop" pattern and proved to be quiet challenging...but very satisfying :)


Sunday, 1 January 2012

Magnetic Money Clip

HAPPY NEW YEAR!!!
Well its 2012 and its HOT!!
We have sweltered through our 2nd day of 40 + Degrees (Celcius) and in a strange way being stuck inside in front of an air conditioner has been good for my leather working. While its been hard to work with the leather as it dries out quickly and the glue/dye seems to take longer to set in the heat, I have found myself for the first time improvising on the patterns included in the leather craft kits from Tandy Leather Factory. Todays project has been a Magnetic money clip. When I traced out the original flower pattern I altered it to include my Initials (L&T) and a stamp that i will be using on all of my projects that identifies me as the craftsman.....a little like a painter signing their artwork. I used the same technique to finish this project as the ID card wallet created previously...I really like the effect as it highlights the stamping and patterns created in the process.

Magnetic Money Clip (open view)

Magnetic Money Clip (closed view)


Friday, 30 December 2011

Flap Mobile Phone Case

My last project for 2011 is a Flap mobile phone case. Today, the last dog of 2011, has been an extra hot day so my family and I have remained indoors with the air conditioner on full watching movies, playing the Wii and making craft projects (my wife Pene is a master digital scrap booker, look for the link to her blog on the right hand menu of this blog). As I stated in my last post I really like the Basket weave stamp design and therefore I have made a project that features this design. I also said I was going to buy some lettering stamps and I have :). This project is really simple as it only uses 2 stamping tools for the basket weave and 1 dye : Saddle tan Hi Lite.


I hope anyone reading this has a fantastic new year and every success in 2012. I personally am turning 40, will have been married for 12 fantastic years and my new years resolution is to spend more time playing with the kids, cuddling my wife, and making leather craft projects.

before

ready to assemble 

Finished front view

Finished back view

Wednesday, 28 December 2011

ID Card Wallet

Amazingly the latest project that i have completed is not a Key fob.....Its a ID card wallet. I used two designs for this project. The first being a Floral design that involved a great deal of cutting with the swivel knife, and stamping with 8 different stamps...quiet a challenge but extremely satisfying. The second design is the basket weave back. This entire basket weave design is done with only 2 stamps (C431 & X511) and is easily my favourite symmetrical design so far. For staining of this project i modified the suggested design and went with a 3 toned effect. To achieve this i firstly used DC cocoa Brown for the background of the Floral Design and then Super Sheen as a resist for the borders and background. Once this had dried overnight i used Briar Brown Hi lite over the flower and basket weave. Overall I'm rather please about the outcome of this project.

Design Traced on...ready to begin cutting & stamping

Staining complete

Project complete front view

Project complete inside view